
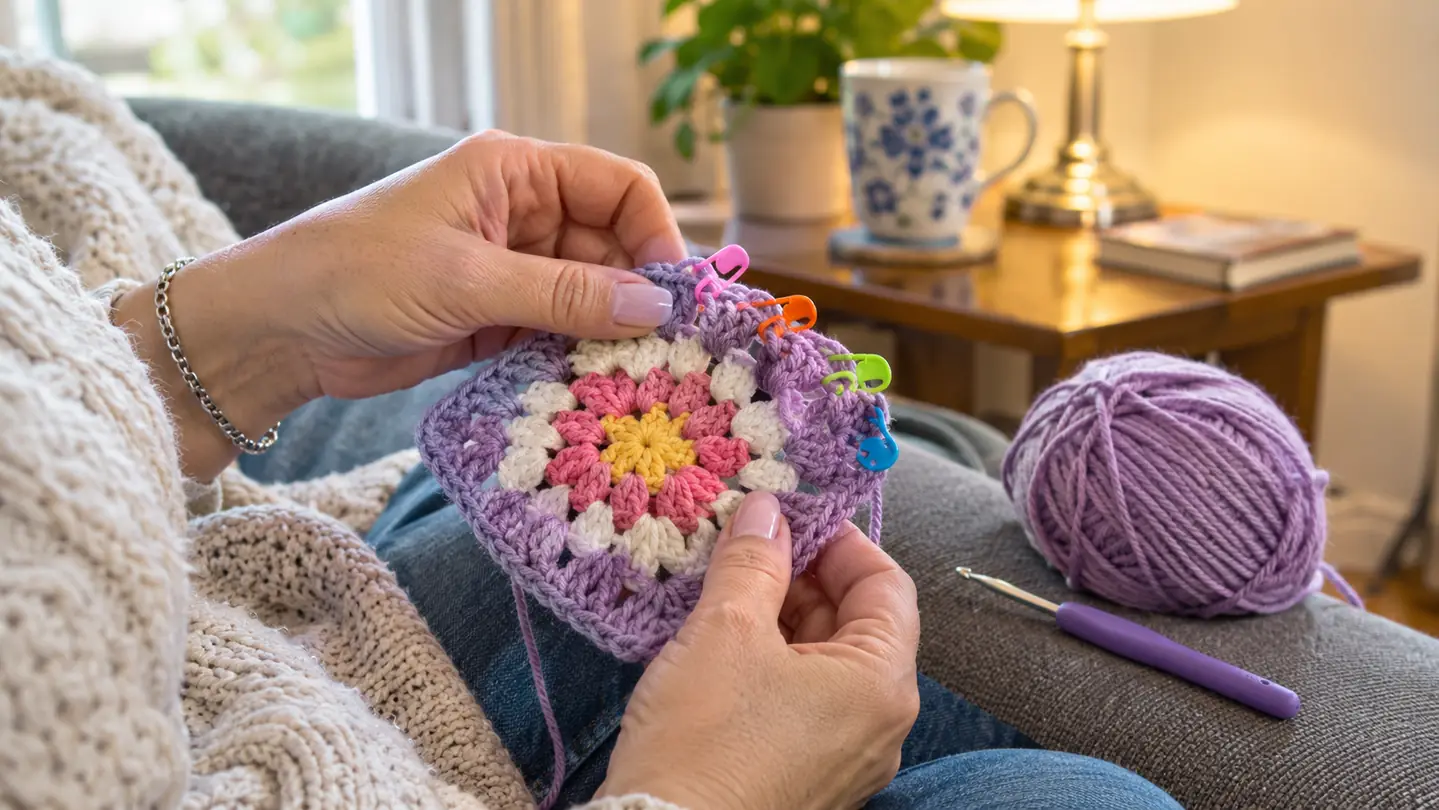
My grandmother taught me to crochet when I was nine, and the first thing she made me do was count. She was right, and I have spent the fifty-odd years since proving it the hard way. A granny square looks forgiving, all those clusters and chain spaces, but one missed double crochet in the second round shows up by round five as a wonky edge that no amount of blocking will fix. I make a lot of granny squares, mostly baby blankets and throws for the hospital charity drive, and I have learned that the counting is not optional. That is why I finally bought a set of Meikeer locking stitch markers, 150 of them in ten colors, and why I am convinced they have saved me more frogging than any other tool in my bag.
The problem with granny squares is that the count changes every round. You start with a ring and a few clusters, and by round six you have dozens of stitches marching around four corners. If you are like me, you will look away to answer the phone, come back, and have no idea whether that last cluster was three double crochets or four. I have tried counting in my head, counting on my fingers, and keeping tally marks on the corner of an old envelope. All of them work until the phone rings. Counting the whole round over again is the honest answer, but it is slow, and it is exactly the kind of slow that makes me put a project down for a week. Markers fix the problem before it starts, because they turn one big count into several small ones.
Stop counting the whole round. Mark the corners instead.
The Meikeer set gives you 150 locking markers in ten colors, fifteen per shade, plus a clear case with a compartment for each color. Use one color for corners and another for the start of the round, and the count stops being a test of memory.
Amazon Check Today's Price on Amazon →Step 1: Count the foundation ring and mark the first cluster of each side
A granny square starts with a ring, usually a few chains joined into a circle, and round one is four clusters of three double crochets separated by chain-two spaces. Most counting mistakes happen in round two, because the work is small and floppy and every stitch looks like every other stitch. So before you start round two, lay the little square flat and count your clusters: one, two, three, four, with a chain-two space between each pair. Clip a marker into the first double crochet of each cluster, the one that sits at the corner. Do this slowly the first time. It takes about a minute, and it saves you from counting the whole round over again ten minutes later.
This is where the size of the Meikeer markers matters. At 22 by 10 millimeters, about 0.86 by 0.4 inch, they are small enough to sit in a chain-two space without stretching it, but big enough to find with an arthritic thumb. The locking clasp opens and closes easily and stays put while the square gets turned and handled. The clasp is gentle enough that I can work it with my right thumb, which is the thumb with the arthritis. I clip mine into the actual stitch, not the space, because the stitch is what I am trying to count.
With four markers in place, round two becomes a series of small instructions: work into the corner space, then into the next cluster, then the next corner. You are not counting a long chain of stitches anymore. You are counting from one marker to the next, and each marker says stop here. That is the whole system in miniature, and it only gets more useful as the square gets bigger.
Step 2: Use a second color for the corners
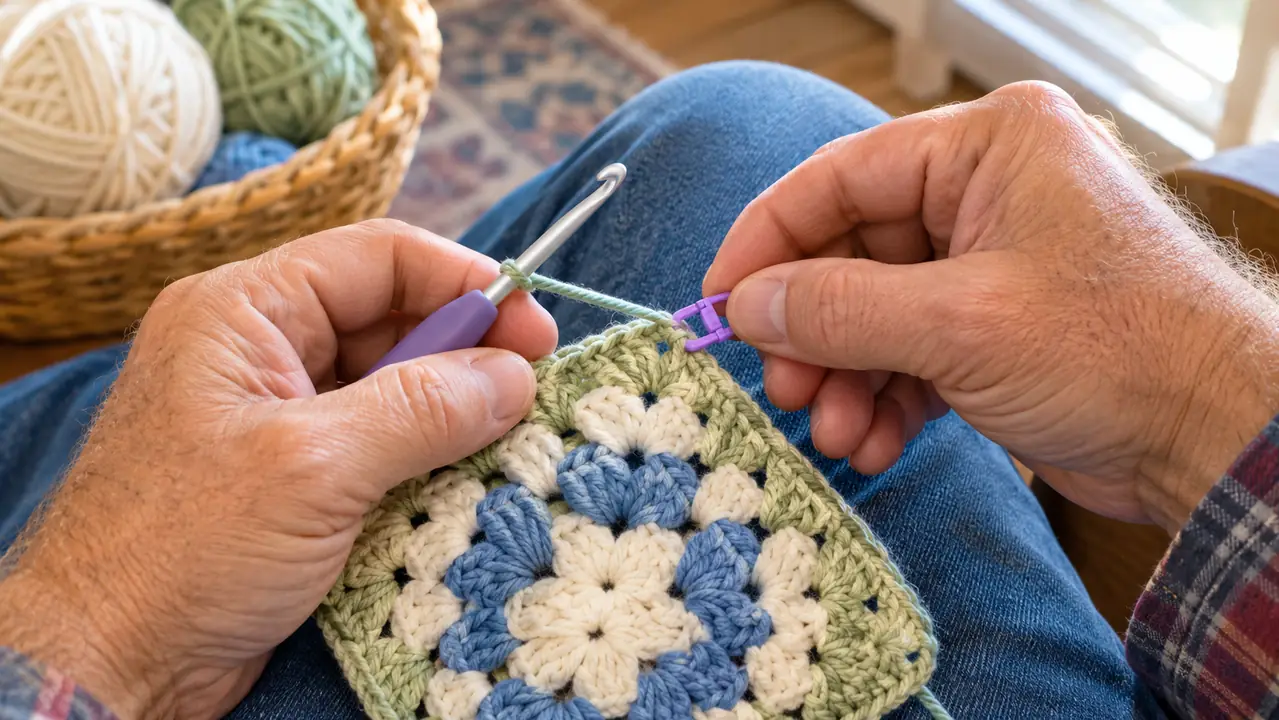
Here is where the ten colors earn their keep. I use one color for the start of the round and a different color for the four corners. Because the set gives fifteen markers per shade, I never run out of the corner color even on a big throw with dozens of squares. Fifteen of each color sounds like a lot until you are marking forty squares that will all be sewn into one blanket. The color code means I can glance at a square from across the room and see whether the corners are marked.
The corner is where granny squares go wrong, because each corner has two clusters and a chain-two space, and when you are tired it is easy to work one cluster into the corner and then sail right past the space. A marker clipped into the chain-two space of each corner is a physical reminder: there is a space here, put two clusters into it, one on each side. The marker does not do the work. It just makes the work visible.
When the round is finished, I pop the corner markers out and move them up to the new corners. The start-of-round marker stays until the square is done, or until I set the work down for the night. Then it becomes the answer to the question of where I stopped, which is worth more than any other single piece of information in a crochet project.
Step 3: Count in small batches and move the marker as you go
Long counts are where my attention fails. If I try to count forty stitches in one pass, I will hit thirty-five, wonder if I counted the slip stitch, and start over. So I do not count forty stitches. I count from marker to marker, and each leg of the journey is eight or ten stitches. Eight is easy. Eight is a number I can hold in my head while the cat walks across my lap. When I reach the next marker, I know that leg is done, and I do not have to remember it anymore.
The markers also work as a round counter. I clip one marker onto the back of the square for each completed round, or I switch to a fresh color every few rounds so I can see at a glance how far along I am. The listing for these markers mentions using them as a stitch counter, row counter and round counter, and that is not just marketing. A marker is a small object that holds a place in your memory, and the more places you hold, the less you have to remember. When I am making hats for the hospital drive, I do not want to think about counting at all. I want the markers to do the bookkeeping while my hands do the crocheting.
If a round does not come out even, the markers tell you where. Count each marked section. The section that is wrong shows itself immediately, and you only frog that section instead of the whole round. I have frogged a lot of crochet in my life, and being able to frog less of it is a genuine pleasure.
Step 4: Mark your place before you set the work down
My cat Pickles is seven years old and weighs about eleven pounds, and he believes that a loose yarn tail is an invitation. I have learned to clip every loose end into the work before I leave the room. The same instinct applies to my place in the pattern. When I stop for the night, I clip a marker into the next stitch I need to work and a different marker into the line of the pattern I am reading. In the morning I do not have to reconstruct anything.
This is the habit that has saved me the most yarn, because most of my frogging happens when I pick up a project after a break and guess wrong about where I was. I learned this the hard way last winter when I put down a half-finished throw, picked it up three days later, and spent an evening unpicking four rounds because I had started the fifth in the wrong corner. A marker costs two seconds to place and saves twenty minutes of careful counting. For a woman with mild arthritis in her right thumb, those twenty minutes are also twenty minutes of not gripping a hook and a yarn needle.
The locking mechanism matters here. A plain split ring or a bobby pin can work its way out of the yarn in a project bag. The little clasp on these holds through being tossed in a tote, sat on, and occasionally batted at by a cat who has decided that plastic is a toy. When I open my project bag, the marker is still where I put it.
Step 5: Keep the colors sorted in the storage box
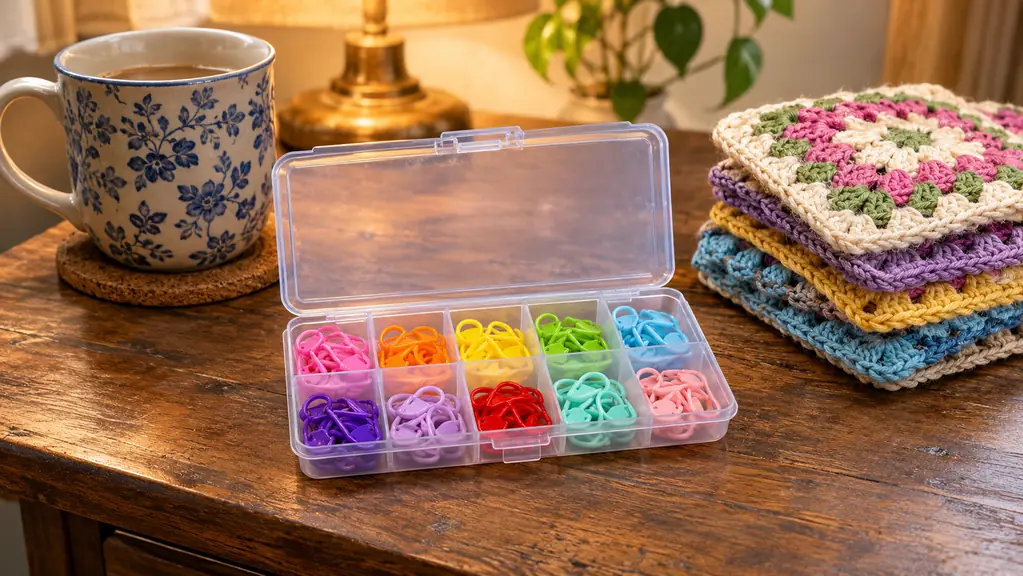
The Meikeer set comes in a clear case with ten compartments, one for each color, and the latch opens with one hand. That last detail matters more than it sounds. My hands are not what they were, and a case that needs two hands and a pry bar will end up living in a drawer. This one sits open on my side table while I work, and I drop each marker back into its compartment when the round is done. The latch clicks shut, and I tuck the whole case into the side pocket of my project bag.
The compartments are color-matched to the markers, which sounds like a small thing until you have spent five minutes hunting for the one color you actually need. I keep the corner color in the compartment closest to my right hand so I can grab it without looking. The clear lid means I can see, at a glance, whether everything is put away or whether Pickles has claimed a marker as a toy.
A system only works if it is easy to maintain. If the markers lived in a tangle at the bottom of my bag, I would not use them, and the stitch count would drift back to the old way: counting, losing count, counting again. The case makes the system effortless, which is why this set has stayed on my side table for months while other tools have wandered off.
What Else Helps
Markers are the biggest help, but they are not the only help. I keep a small spiral notebook with a column for each charity blanket, and I write down the hook size and the number of rounds when I put a project down. I also use a smooth cotton yarn for practice squares when I am trying a new stitch, because cotton does not split as easily and it shows mistakes clearly. And I count out loud when I am learning a new pattern, quietly enough that the cat is the only one who hears me.
The markers do the heavy lifting. The notebook and the counting out loud are just backups for the backup. I also make sure the floor lamp is aimed at my hands and not at the television, because a mistake I can see is a mistake I can fix before it becomes a whole round. And on days when my thumb is tired, I put the hook down. A marker will still be there tomorrow.
A marker costs two seconds to place and saves twenty minutes of careful counting. That is the best trade in crochet.
Counting is not the fun part of crochet. But it is the part that keeps the fun part fun. A blanket for a new grandchild or a stack of squares for the hospital drive should be a pleasure from the first chain to the last weave-in, and a few small plastic markers are a cheap way to make sure it is.
If you are the kind of crocheter who has ever ripped out a whole square because the edges would not lie flat, you already know what I mean. The markers will not make your tension even or your corners sharp. But they will tell you the truth about where you are in the pattern, and that is most of the battle.
150 markers, ten colors, one compartment for each shade
The Meikeer set has been on my side table for months, and I reach for it every time I start a square. If you make granny squares for grandchildren or charity, this is the kind of small tool that quietly changes how often you frog.
Amazon Check Today's Price on Amazon →